
How to use this page
- Work through Tasks 1–3 and tick each step as you complete it. Your progress and answers are saved in this browser automatically.
- Wherever you see
 Screenshot, capture your lab progress and attach the screenshot right on this page. Add a short explanation for each.
 - Answer the Task 4 questions, then use Print / Save as PDF to export your answers and screenshots as one submission file.
- Remember to delete your lab resources after capturing everything.
Lab Objectives and Architecture reference
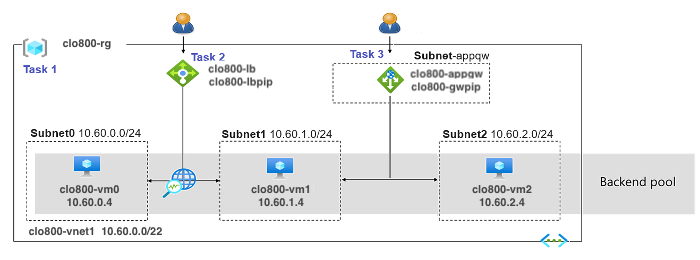
Lab scenario: Your organization has a public website. You need to load balance incoming public requests across different virtual machines. You also need to provide images and videos from different virtual machines. You plan on implementing an Azure Load Balancer and an Azure Application Gateway. All resources are in the same region.
In this lab, you will:
- Task 1 — Use a template to provision an infrastructure 20 pts
- Task 2 — Configure an Azure Load Balancer 30 pts
- Task 3 — Configure an Azure Application Gateway 30 pts
- Task 4 — Summary Questions & Review 20 pts
You will build this topology across Tasks 1–3.
Task 1: Use a template to provision an infrastructure 20 pts
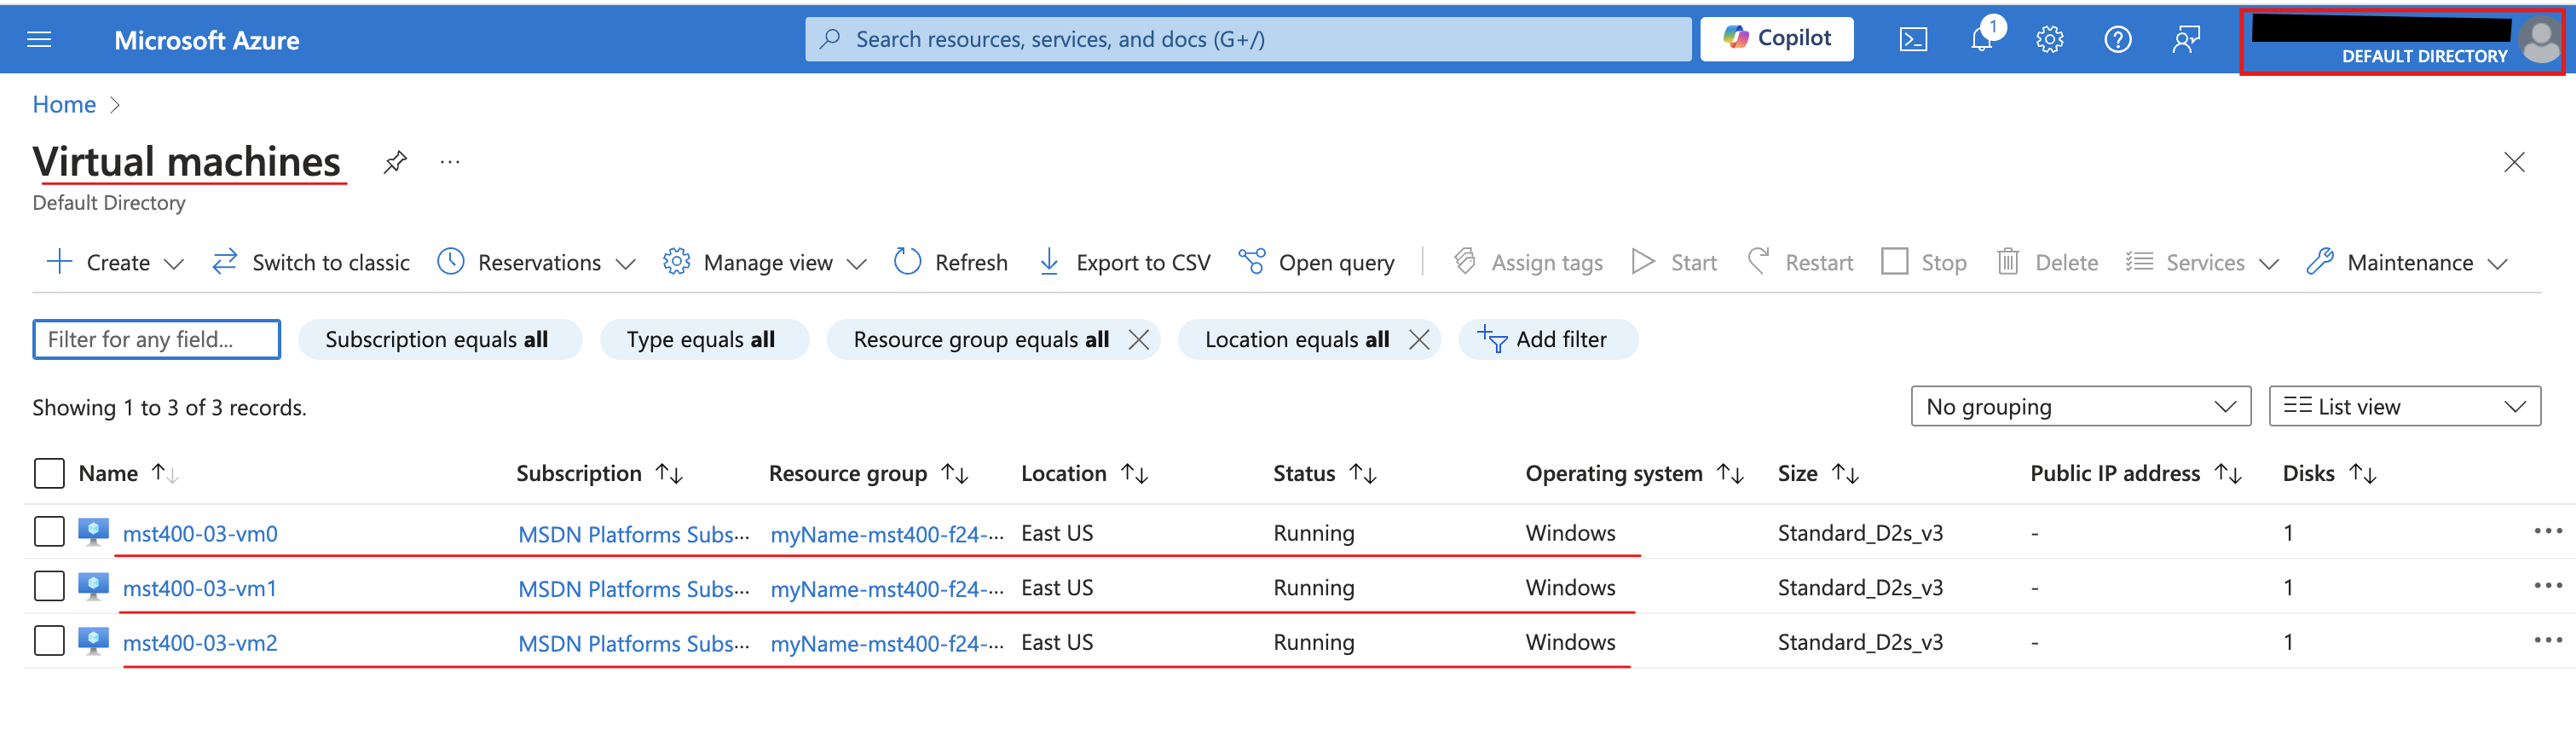
In this task, you will use a template to deploy one virtual network, one network security group, and three virtual machines.
-
Setting Value Subscription your Azure subscription Resource group <yourName>-clo800-F67-rgPassword Provide a secure password - Screenshot must show your Odl_user account, the deployed resources: one virtual network (clo800-F67-vnet1) with three subnets, each subnet with a virtual machine
Task 2: Configure an Azure Load Balancer 30 pts
In this task, you implement an Azure Load Balancer in front of the two Azure virtual machines in the virtual network. Load Balancers in Azure provide layer 4 connectivity across resources, such as virtual machines. Load Balancer configuration includes a front-end IP address to accept connections, a backend pool, and rules that define how connections should traverse the load balancer.
Note: Notice the Load Balancer is distributing across two virtual machines in the same virtual network.
-
Setting Value Subscription your Azure subscription Resource group <yourName>-clo800-F67-rgName <yourName>-clo800-F67-lbRegion The same region that you deployed the VMs SKU Standard Type Public Tier Regional -
Setting Value Name <yourName>-clo800-F67-feIP type IP address Gateway Load Balancer None Public IP address Select Create new (use the instructions in the next step) -
Setting Value Name <yourName>-clo800-F67-lbpipSKU Standard Tier Regional Assignment Static Routing Preference Microsoft network -
Setting Value Name <yourName>-clo800-F67-beVirtual network clo800-F67-vnet1Backend Pool Configuration NIC clo800-F67-vm0 check the box clo800-F67-vm1 check the box -
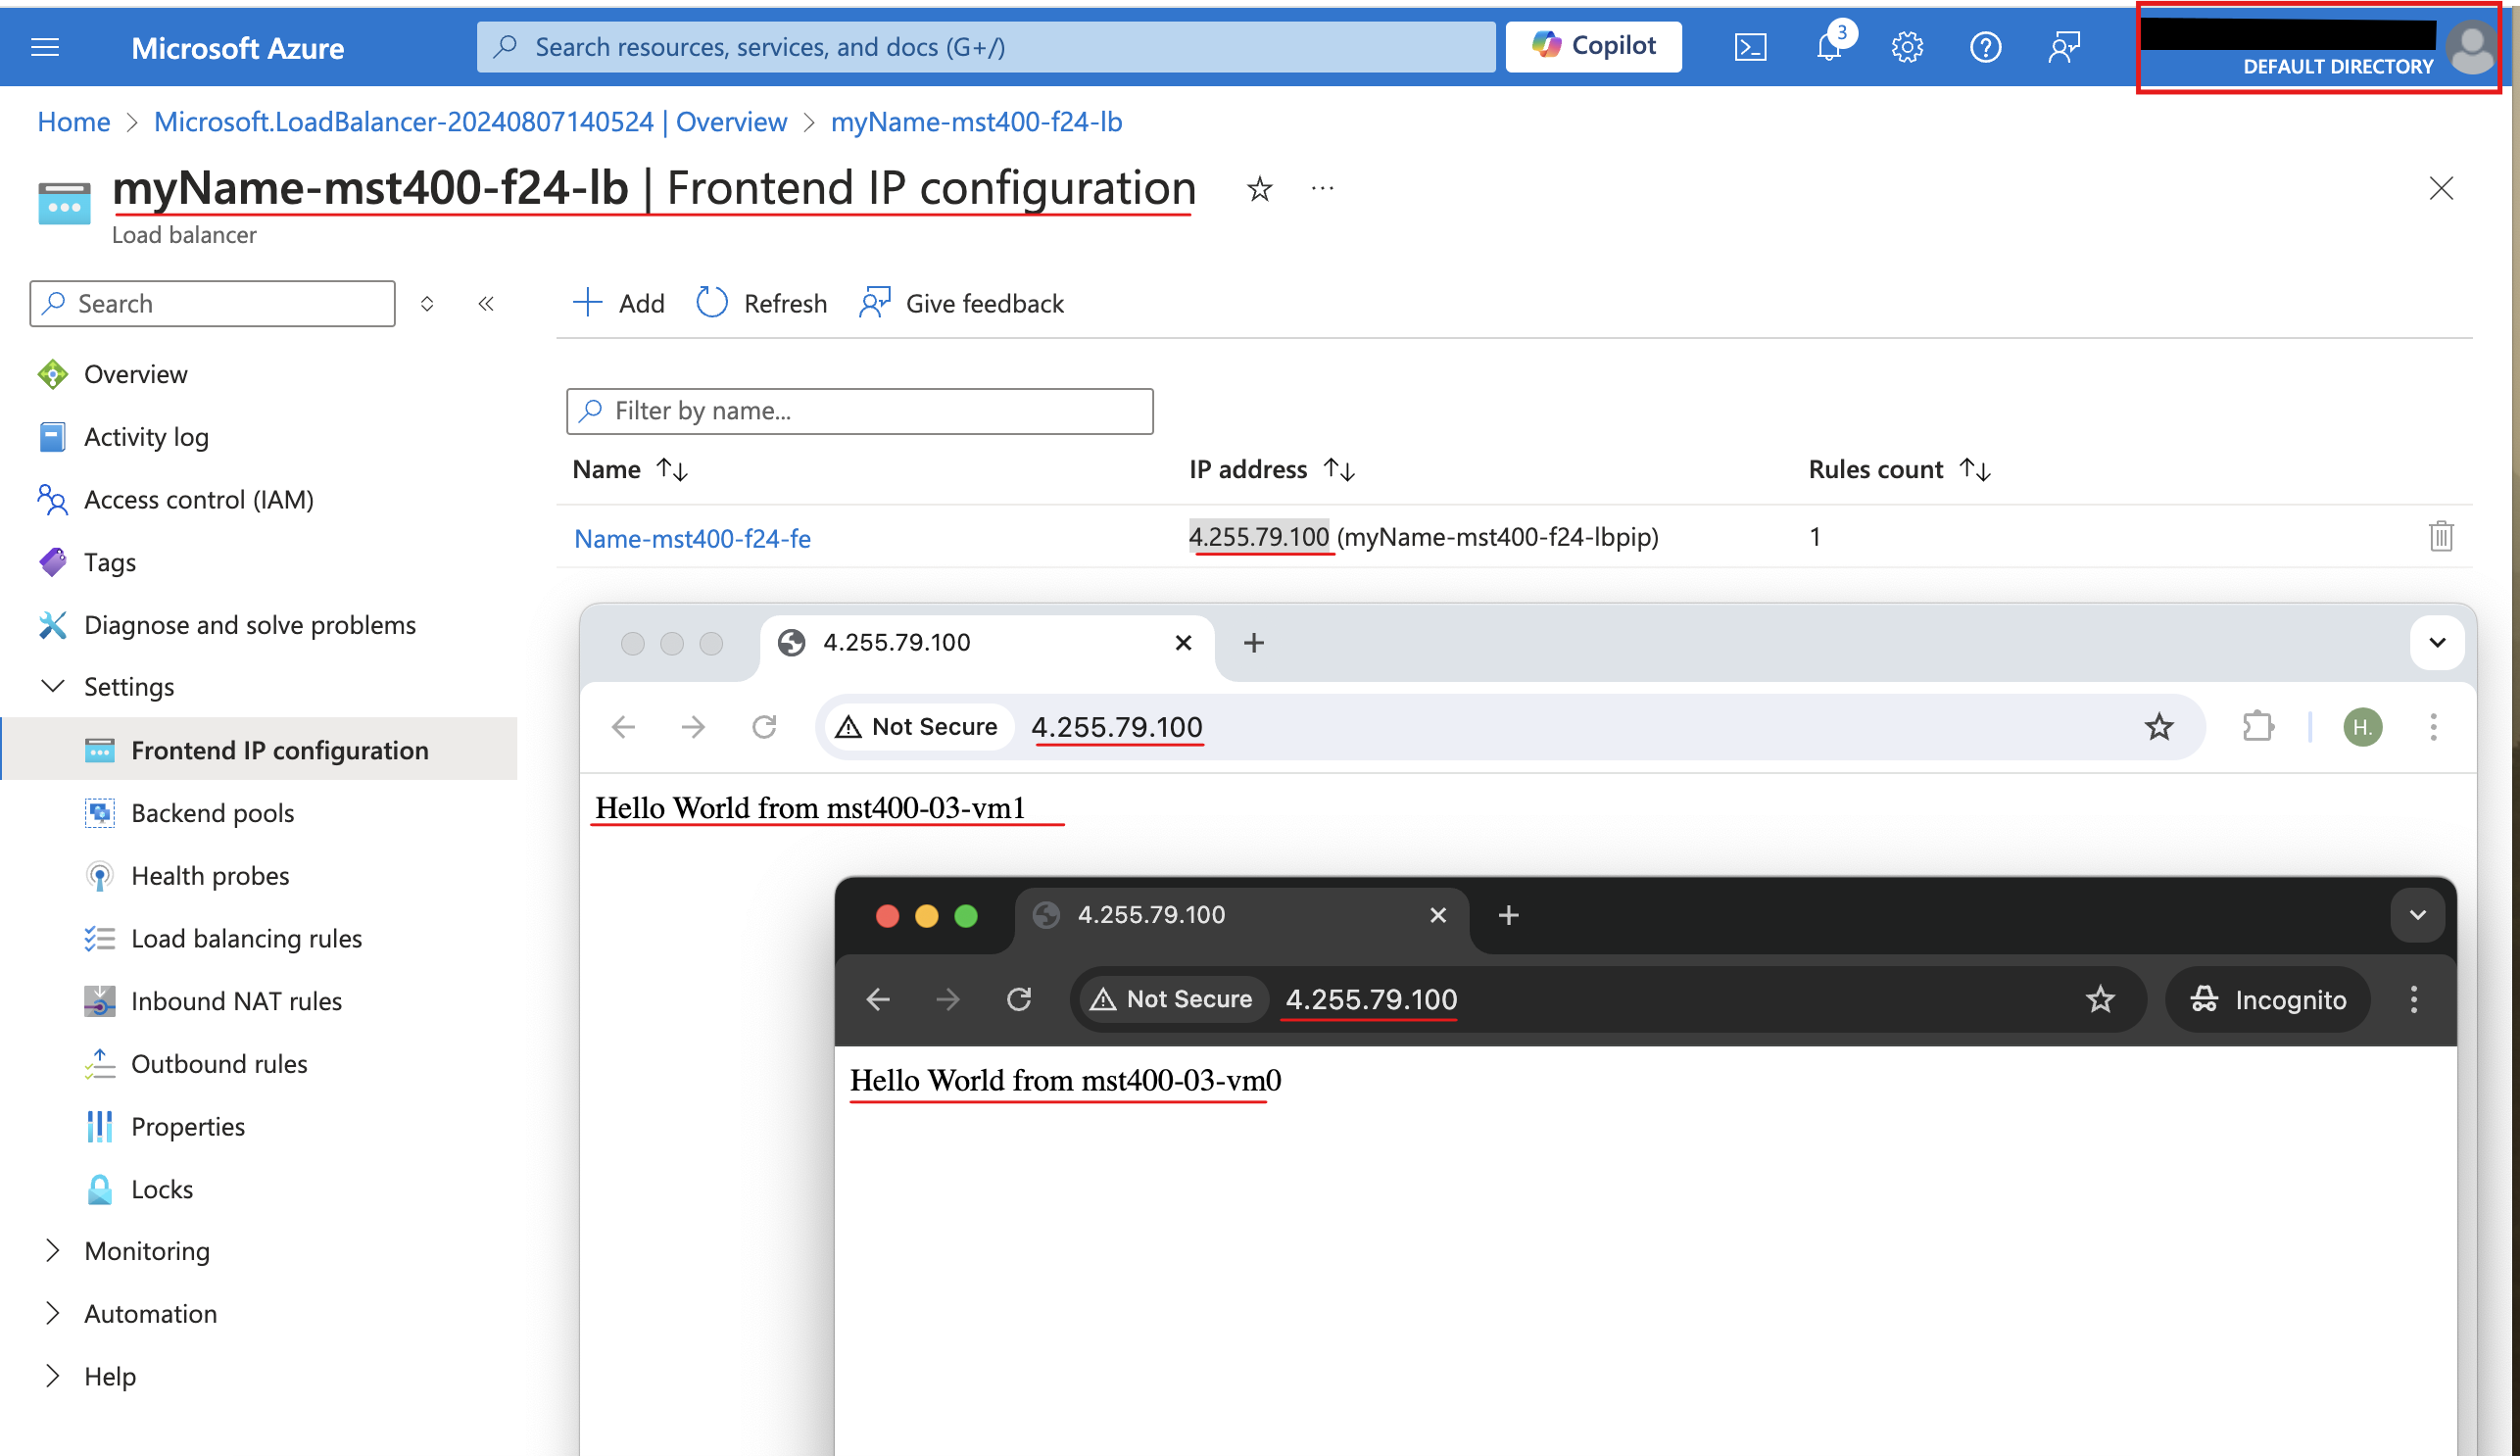
Setting Value Name <yourName>-clo800-F67-lbruleIP Version IPv4 Frontend IP Address <yourName>-clo800-F67-feBackend pool <yourName>-clo800-F67-beProtocol TCP Port 80 Backend port 80 Health probe Create new Name <yourName>-clo800-F67-hpProtocol TCP Port 80 Interval 5 Close the create health probe window — Save — Session persistence None Idle timeout (minutes) 4 TCP reset Disabled Floating IP Disabled Outbound source network address translation (SNAT) Recommended - Screenshot must show your Odl_user account, the browser displaying "Hello World from clo800-F67-vm0" or "Hello World from clo800-F67-vm1" (load balancer frontend)
Task 3: Configure an Azure Application Gateway 30 pts
In this task, you implement an Azure Application Gateway in front of two Azure virtual machines. An Application Gateway provides layer 7 load balancing, Web Application Firewall (WAF), SSL termination, and end-to-end encryption to the resources defined in the backend pool. The Application Gateway routes images to one virtual machine and videos to the other virtual machine.
Note: This Application Gateway is working in the same virtual network as the Load Balancer. This may not be typical in a production environment. Refer to the lab architecture diagram.
-
Setting Value Name subnet-appgwStarting address 10.60.3.224 Size /27 -
Setting Value Subscription your Azure subscription Resource group <yourName>-clo800-F67-rgApplication gateway name <yourName>-clo800-F67-appgwRegion The same Azure region that you used in Task 1 Tier Standard V2 Enable autoscaling No Instance count 2 Availability zone 1 HTTP2 Disabled Virtual network clo800-F67-vnet1Subnet subnet-appgw (10.60.3.224/27) -
Setting Value Frontend IP address type Public Public IP address Add new Name <yourName>-clo800-F67-gwpipAvailability zone default -
Setting Value Name <yourName>-clo800-F67-appgwbeAdd backend pool without targets No Virtual machine clo800-F67-nic1 (10.60.1.4)Virtual machine clo800-F67-nic2 (10.60.2.4) -
Setting Value Name <yourName>-clo800-F67-imagebeAdd backend pool without targets No Virtual machine clo800-F67-nic1 (10.60.1.4) -
Setting Value Name <yourName>-clo800-F67-videobeAdd backend pool without targets No Virtual machine clo800-F67-nic2 (10.60.2.4) -
Setting Value Rule name <yourName>-clo800-F67-gwrulePriority 10 Listener name clo800-F67-listenerFrontend IP Public IPv4 Protocol HTTP Port 80 Listener type Basic -
Setting Value Backend target <yourName>-clo800-F67-appgwbeBackend settings <yourName>-clo800-F67-http(create new) -
Setting Value Path /image/*Target name images Backend settings <yourName>-clo800-F67-httpBackend target <yourName>-clo800-F67-imagebe -
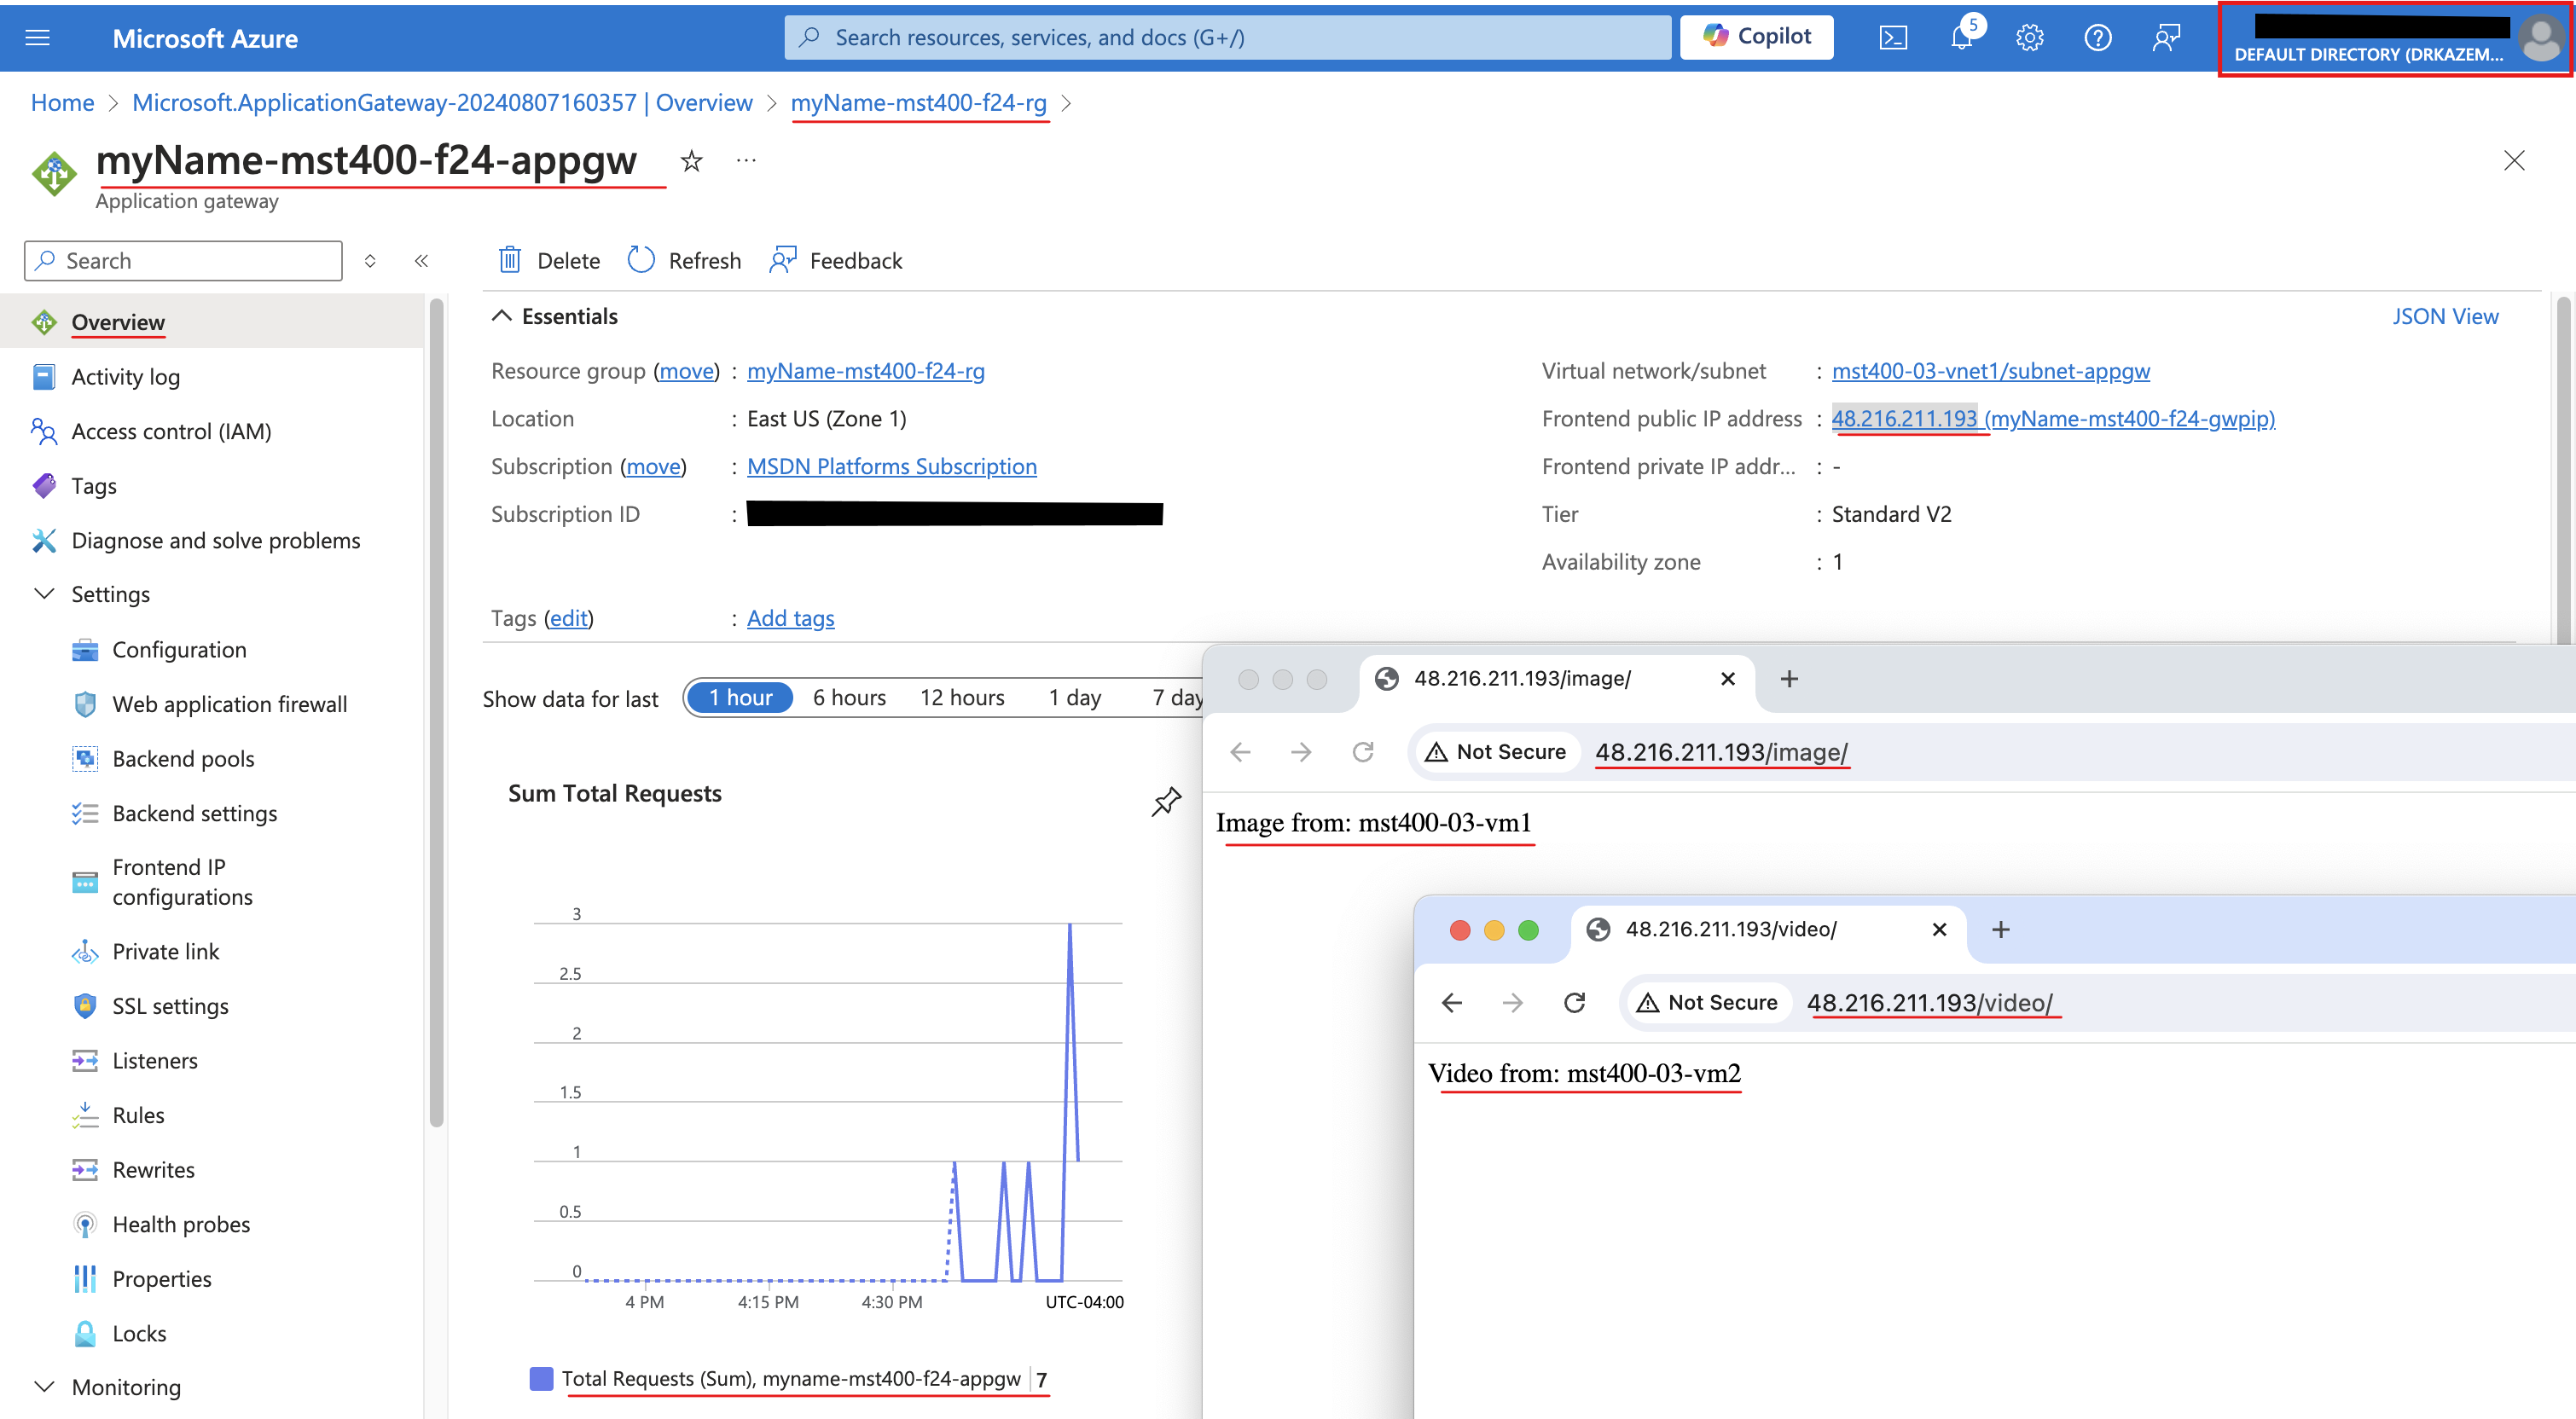
Setting Value Path /video/*Target name videos Backend settings <yourName>-clo800-F67-httpBackend target <yourName>-clo800-F67-videobe - Screenshot must show your Odl_user account, the Application Gateway overview (frontend public IP) and the browser tests — /image/ showing "Image from clo800-F67-vm1" and /video/ showing "Video from clo800-F67-vm2"
Task 4: Summary Questions & Review 20 pts
Minimum 2-3 sentences each — original thinking, your own words!
Sample screenshots reference
These are samples only. Your screenshots may vary, but they should include similar details.
Clean up your resources
Note: Remember to delete any Azure resources created for this lab after capturing all your information and screenshots. Removing unused resources ensures you will not have unexpected charges and helps you manage your Azure credit for the course. Delete all resource groups except the Odl-Seneca-lab default resource group.
Your submission preview
Screenshots you attach above and your Task 4 answers appear here. This is exactly what prints/exported as your PDF.
CLO800 Lab 03 - Network Traffic Management
Name: . Account: ·
Professor: Dr. Kazemi